Key Points
- Cleaning your attic is important because it improves air quality, prevents mold and pests, protects stored items, and supports your home’s structural health.
- Preparing for attic cleaning means using proper safety gear, gathering the right tools, and inspecting for issues like leaks, pests, or damage before starting.
- The step-by-step attic cleaning process includes removing stored items, vacuuming and wiping surfaces, treating stains, eliminating mold, and disposing of waste properly.
Your attic might be out of sight, but it shouldn’t be out of mind. This often-forgotten space can harbor dust, stains, and mold that affect your home’s air quality and your family’s health.
Whether you’re preparing for spring cleaning or dealing with specific issues, this comprehensive attic cleaning guide will help you transform your dusty storage space into a clean, healthy environment.
What is an Attic?
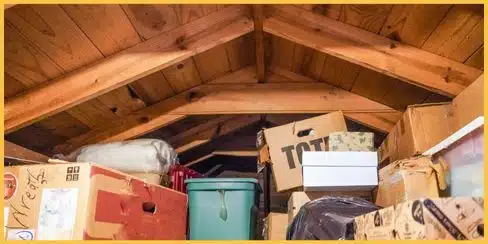
An attic is the space directly below your roof and above your home’s living areas. Most homes have either a finished or unfinished attic space. Finished attics serve as extra living space or bedrooms. Unfinished attics typically store seasonal items, holiday decorations, and household belongings.
Attics often have limited ventilation and irregular temperatures. These conditions make them prone to dust accumulation, moisture problems, and potential mold growth. Understanding your attic’s layout and conditions helps you clean it more effectively.
Why is it Important to Clean Your Attic?
Cleaning your attic helps keep your home healthy and strong. Here are a few reasons why it matters:
- Improves air quality – Dust, dirt, and mold spores in your attic can travel into your living spaces.
- Prevents structural damage – Mold and moisture can slowly damage wood beams and insulation.
- Discourages pests – Rodents and insects are less likely to settle in a clean, organized space.
- Protects stored items – Seasonal décor, keepsakes, and clothing stored in the attic last longer in a clean environment.
A tidy attic is not only safer but also increases your home’s value if you plan to sell.
How to Prepare for Attic Cleaning
Before you start, make sure you are prepared. Proper preparation is key to a safe and efficient cleaning process. Here’s a checklist of what you’ll need:
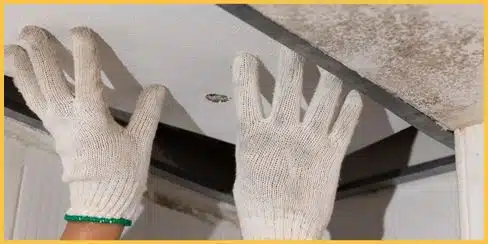
1. Check Your Safety Equipment
Protect yourself from potential hazards like dust, mold, and insulation fibers.
- N95 respirator mask: This protects your lungs from inhaling dust and mold spores.
- Safety goggles: They keep your eyes safe from debris.
- Gloves and long clothing: Wear thick gloves, long sleeves, and pants to protect your skin from irritants and sharp objects.
- Headlamp or flashlight: Attics are often dark, so a good light source is crucial.
2. Gather the Essential Tools
Having the right tools makes your cleaning process much smoother and more thorough.
Cleaning supplies you’ll need:
- Vacuum cleaner with hose attachment
- Broom and dustpan
- Microfiber cloths
- Plastic drop cloths
- Garbage bags (heavy-duty)
- Storage boxes or bins
- Labels and markers
- Disinfectant spray
- Mold removal products (if needed)
3. Do a Pre-Inspection of the Attic
Walk through your attic before cleaning to identify problem areas. Look for signs of water damage, mold growth, pest activity, or structural issues. Check insulation condition and note areas that need special attention.
Take photos of any damage for insurance purposes. This inspection helps you plan your cleaning approach and determine if you need professional help for serious problems.
Step-by-Step Attic Cleaning Guide: Removing Dust, Stains, and Mold
Once you have your safety gear and tools ready, you can begin the cleaning process. Follow these steps carefully to ensure a thorough and effective clean:
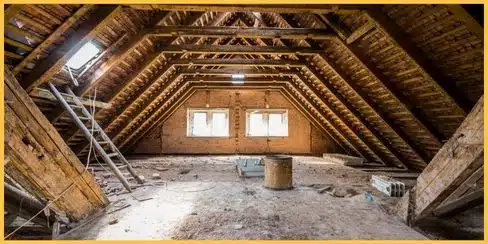
Step #1: Clear Out Stored Items
Start by removing everything from the attic. This allows you to reach every corner of the space. As you declutter your items, sort them into “keep,” “donate,” or “discard” piles. Store the items you’re keeping in sealed, durable containers to protect them from future dust and pests.
Step #2: Remove Dust and Loose Debris
Begin your deep clean by tackling the dust. This is the foundation of the whole process.
- Vacuum first: Use your vacuum with a brush attachment to remove dust from rafters, joists, and exposed insulation.
- Sweep and collect: Sweep up all loose debris from the floor. Use your dustpan to collect and dispose of it.
- Wipe down surfaces: Use a damp cloth to wipe down solid surfaces like plywood or wood beams.
Step #3: Treat Surface Stains
Attic stains are often caused by water leaks. Once you’ve fixed the source of the leak, you can treat the stains. For minor stains, a simple mix of water and mild detergent can be effective. For tougher stains, you may need a specialized cleaner. Always test any cleaner on a small, hidden area first.
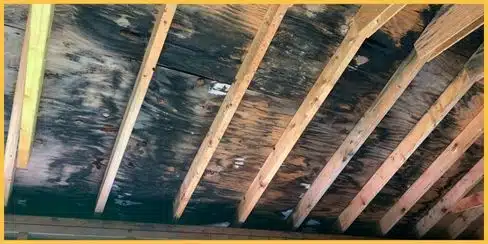
Step #4: Eliminate Mold Safely
Mold can be a serious problem. It’s a health hazard that requires a careful approach. According to a study, dampness and mold are linked to a 30-50% increase in respiratory illnesses worldwide, including asthma.
- Prepare your solution: A common and effective DIY solution is a mix of equal parts white vinegar and water.
- Apply the solution: Put the solution in a spray bottle. Spray it directly onto the moldy surfaces.
- Let it sit: Allow the solution to sit for about an hour to kill the mold.
- Scrub the area: Use a stiff-bristled brush to scrub the mold away.
- Wipe it clean: Wipe the area with a clean cloth.
- Dry thoroughly: Ensure the area is completely dry before you put anything back. You can use fans or a dehumidifier to speed up the process.
For extensive mold growth, it’s best to hire a reliable professional cleaning service.
Step #5: Dispose of Waste Properly
Seal all collected debris and old items in heavy-duty trash bags. This prevents dust and spores from spreading as you carry them out. Dispose of the bags and any old items you don’t need anymore.
Tips to Prevent Mold Growth in Your Attic
A clean attic is a great start. But prevention is the best long-term strategy. Here are a few tips to keep your attic mold-free:
1. Improving Ventilation
Proper ventilation prevents moisture buildup that leads to mold growth. Your attic needs both intake and exhaust vents to create proper airflow. Intake vents should be located in the soffits, while exhaust vents belong near the roof peak.
According to building codes, you typically need 1 square foot of ventilation for every 150 square feet of attic space. The International Residential Code requires a minimum ventilation ratio of 1:150 for most attic applications. Ensure vents aren’t blocked by insulation or stored items.
2. Controlling Moisture
Keep humidity levels below 60% to prevent mold growth. Install a hygrometer to monitor moisture levels in your attic. Address any roof leaks immediately, as even small leaks can create significant moisture problems.
Ensure bathroom and kitchen exhaust fans vent outside, not into the attic. Check that dryer vents also terminate outside your home. These appliances can introduce large amounts of moisture into your attic space.
3. Scheduling Inspections
Inspect your attic at least twice yearly, preferably in spring and fall. Look for new water stains, musty odors, or visible mold growth. Early detection allows for easier and less expensive remediation.
Consider professional cleaners’ inspections if you notice persistent moisture problems or have had previous mold issues. Professional inspectors can identify problems you might miss and recommend appropriate solutions.
Frequently Asked Questions
You probably have more questions about attic cleaning. Here are some of the most common ones we hear:
FAQ #1: What Causes Mold to Grow in Attics?
Mold in attics is usually caused by moisture. This moisture can come from roof leaks, poor ventilation, or condensation. When warm, moist air from your home rises into a cold attic, it creates condensation on surfaces, which is a perfect breeding ground for mold.
FAQ #2: How Often Should I Clean My Attic?
The frequency depends on several factors, including the age of your home and your local climate. A full deep clean is recommended every few years. However, a quick inspection every six months is a good practice to catch problems early.
FAQ #3: Can I Clean Attic Mold on My Own?
Yes, you can. You can clean small areas of mold yourself if you follow safety precautions. However, if the mold covers a large area (more than a few square feet), or if you have a compromised immune system, it’s best to hire a professional.

Conclusion
A clean attic contributes to your home’s overall health and safety. Regular cleaning prevents dust accumulation, eliminates mold growth, and protects your stored belongings. Following this comprehensive attic cleaning guide helps you maintain a healthier home environment for your family.
From Dust to Fresh, Your Attic Deserves Care
If cleaning your attic feels overwhelming, you can count on Hellamaid’s professional cleaners. Our trained and friendly team has the right tools, knowledge, and experience to deep clean any part of your home or office.
With no hidden charge fees and an easy online booking process, scheduling your cleaning has never been simpler. Plus, you can even save more with our gift cards. Don’t wait, let’s start freshening up your space now!